 Living With Healthy Hunger Health Blog

Hey there! Cannabis grower. Imagine the tiny seedlings you potted have grown into luscious trichome-rich buds. You have harvested them already and are breathing a sigh of relief. But, wait, dear friend. There is some more work to do. You need to dry and cure the weed as early as possible.
The process of drying and curing cannabis buds guarantees significant improvement in the quality and taste of your buds. I will share all about this process today.
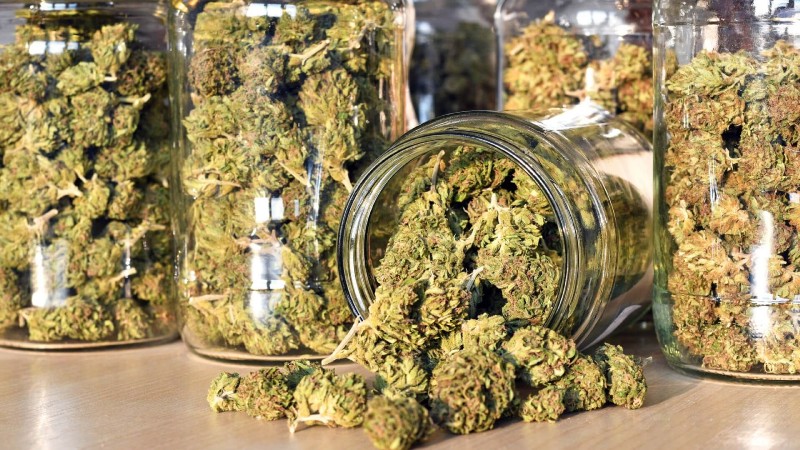
Curing means drying the marijuana buds slowly in a controlled manner. Following that, you need to keep the dried buds in glass containers. You will see that the marijuana smells better after a few weeks, and perhaps, their taste and potency have also increased.
But why is drying and curing so important?
Increased Cannabis Potency
The curing process enables the conversion of non-psychoactive cannabidiol into psychoactive THC or tetrahydrocannabinol. Therefore uncured buds have low THC and, thus, are lower in potency.
Enhanced Flavor And Quality
You might know already that an element called terpene provides a unique flavor and aroma to cannabis. Slow curing preserves the terpene content and ensures that they taste and smell divine.
With curing, the chlorophyll in the buds breaks down, and harshness from the weed is removed.
Enables You To Preserve Your Harvest
High-quality curing will allow you to store your weed for a longer period.
I store my cured buds in airtight containers, and they have stayed for almost two years, retaining their quality.
Uncured weed will lose the cannabinoid content and might develop mold.
Method Of Drying And Curing Cannabis
Winter or fall is the best time to dry and cure weed. If the climate around you is generally warm with low humidity, you are blessed. Otherwise, you have to pay a lot of attention during the process.
This process can get tricky as there is no particular temperature or humidity level that ensures the best result. Though drying and curing small batches are relatively easier than commercial quantities.
Your curing and drying room must have good ventilation with lots of fresh and filtered air coming from outside. You might also need odor control for the exhausted air.
You might notice how wet and sticky the cannabis flowers are when you harvest them. This shows that your plants have produced copious amounts of resin. However, these develop fungi and bacteria when left uncured.
From freeze-dry, dry ice to water cure, there are multiple methods for post-processing the weed. Today, I will share the drying and curing method I use for small batches of harvest.
Cut 12-inch stems from the plants and trim away the leaves that are not needed. Then hang them on a cloth hanger or string.
Equipment Needed
If you don’t have enough space to hang the buds, you will need some equipment like wide-mouth mason jars and a drying rack. Optionally, You can also invest in a hygrometer and humidipacks.
Trimming – Wet Trimming Or Dry Trimming
‘Wet trimming’ is where you trim the plants right after they get ripe. Cut the individual branches and trim unnecessary leaves and stems with shears. Keep some sugar leaves as they are good for edibles.
Mostly used on a commercial sale, cut branches are hung upside down in individual lines in case of ‘Dry trimming.’ They are trimmed after they are completely dry. This method might get tricky as the leaves get curled upwards.
Make sure to trim off larger fan leaves to improve the look of your buds. The presence of a lot of leafy matter will make the smoke harsh.
If the humidity level is on average below 30% where you live, you need to trim fewer leaves.
Hanging The Buds
You need to ensure the right humidity and temperature to facilitate proper drying. Ideally, 60-70 degrees Fahrenheit temperature and 45-55% humidity work best. You can also use a small fan to aerate the room but not point it directly at the drying buds.
You can use a humidifier or dehumidifier, or an air-conditioning unit for this purpose.
Hang your weed in a cool and dark place. If possible, keep the room in absolute darkness. This removes chlorophyll and gives you tasty, aromatic cannabis.
Drying Without Hanging Or Equipment
Suppose you don’t have any means to control the temperature and humidity; wait for at least four days before checking the weed. If smaller buds snap cleanly when you snap them off a stem, they are ready to be cured. Or else, wait for a few days. If you don’t have the means to hang the weed, place them on cardboard or some other flat surface and turn them once every hour.
Based on the room’s conditions, the buds will get ready in 7-12 days if the smallest buds snap off with slight pressure. The buds are ready to be cured.
For larger produce, you can place the stems in a bin without a lid. Check the bottom of the bid every day. If there is more moisture in the bottom than the top, flip them over. When the dryness is equal on both sides, you can put on the lids. Let us now head on to the curing process.
Step By Step Guide To Curing Your Marijuana Buds
Step 1: Separate
Snip the buds from the branches if you haven’t done it already.
Step 2: Place into a Container
Wide mouth glass jars of medium size are the best containers for weed. Fill them up so that one-third of the jar has room for air.
Shake the container every now and then. If the buds stick together, the drying process is not complete.
Step 3: Store in a Dark Place
A cool, dry, and dark spot is ideal for storing the buds.
Step 4: Check-Up
Let the buds breathe by opening the jars every now and then. This provides more oxygen and lets the humidity escape.
- Suppose you smell a foul ammonia-like odor. There might be bacterial growth. You have to take adequate measures as soon as possible.
You can check the container’s humidity if a hygrometer is handy. The ideal humidity range is between 60-65%. If the humidity is outside this range, do the following things:
- Above 70%: keep your buds outside the jar for 12-24 hours.
- 65-70%: Remove the jar’s lid for 2-4 hours but do not bring out the bud.
- 55% or less: if you have a humidipack, use it to re-humidify. Orange peel or some other organic matter also will help you rehydrate the pack.
Whenever you check the jars, keep them open for a few moments. After a week, check the jars once every two days. You can leave the buds inside the jar for up to three or more days if you believe they are too dry.
Step 5: Repeat for 2-3 Weeks
Three weeks of curing is enough for great smoking marijuana. However, some feel that a cure time of 8 weeks is optimal.
Step 6: Pack and Weigh
You can use humidity packs to store the weed. Get a low-cost cannabis scale available online. Weigh your weed, calculate your usage, and set intentions of how long this batch will last.
With increasing marijuana legalization, attention to the quality is increasing. This means the drying and curing process is getting its due attention. This is welcome news for weed lovers like you and me. With no specialized equipment necessary, you can dry and cure weed at the comfort of your home.
For the best quality harvest, I always recommend buying good-quality seeds from top online websites. You can check out the range of seeds at the Homegrown Cannabis Co. and ensure a great harvest for yourself.
Here’s wishing you good luck on this adventure. Go on, conquer the weed landscape. Grow some great stuff, mate.

